Configuring CylanceGATEWAY to Output Syslogs
CylanceGATEWAY now offers Syslog output! Syslogs are ‘push’ rather than ‘pull’ in nature, so GATEWAY updates come to you as they happen - if you’re listening for them!
The goal of this blog is to demonstrate the following:
1. How to configure CylanceGATEWAY to register new users to your domain.
2. Install and setup CylanceGATEWAY on your desired machine to test Syslogs.
3. How to add a rule to CylanceGATEWAY to block a given website, so that when the device attempts that connection, it will generate a Syslog. This will be useful for testing purposes.
4. How to configure the CylancePROTECT Syslog connector to push CylanceGATEWAY Syslogs to your Syslog server.
5. Show an example CylanceGATEWAY Syslog.
If you already have CylanceGATEWAY setup in your environment, Steps (1) and (2) might already be completed, and you can skip ahead to step (3).
While you might already have GATEWAY setup in your environment, to be able to receive CylanceGATEWAY Syslogs some additional steps must be completed first. But don’t fret, this blog post will walk you through each step to get CylanceGATEWAY syslogs working for you. If you don’t have experience with Cylance syslogs or syslogs in general, you can check out my previous blog on how Cylance Syslogs work in general!
1. Configuring CylanceGATEWAY for your User
To start configuring CylanceGATEWAY, you must have a CylancePROTECT instance with a Gateway connector. Assuming you have this already, we can go ahead and create a Gateway policy for your user. For this blog, we are going to be capturing a Policy violation Syslog, where the end-user attempts to connect to a blocked website.
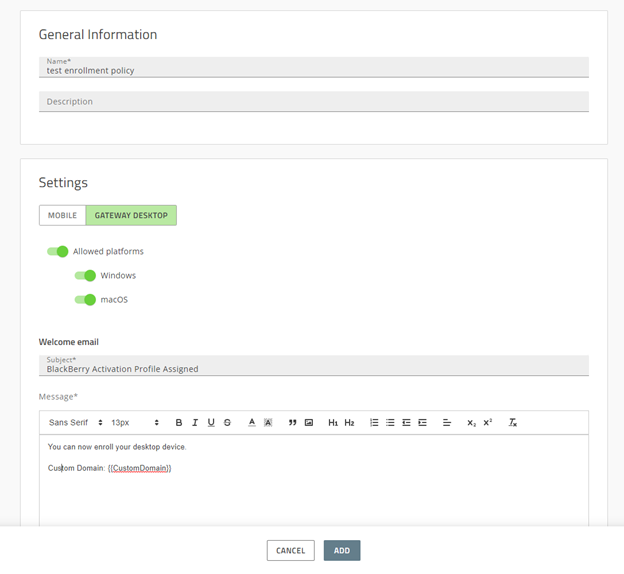
In this step, we are going to enroll a user to GATEWAY. In your CylancePROTECT console, navigate to Policies -> User Policy. First, we will add an Enrollment Policy. Make sure you are on the “enrollment” tab and click the “Add Policy” button.
You will see a screen that looks like the above picture. Fill in the name to be whatever you want and ensure that the platform where you will be using CylanceGATEWAY is selected. In the “Welcome email” section ensure you have “{{CustomDomain}}” somewhere in the body of the email. This will tell you the custom domain which is needed for activating CylanceGATEWAY on your device. Once all this is done, click the “Add” button.
Next, you will add a Gateway Service Policy.
Click on the “Gateway Service” tab in the “User Policy” section. Click “Add Policy”.
You can leave everything as default and just give it a name and click “Add”.
Now that you have configured Enrollment, and your Gateway Service Policies have been added, it’s time to apply them to a user.
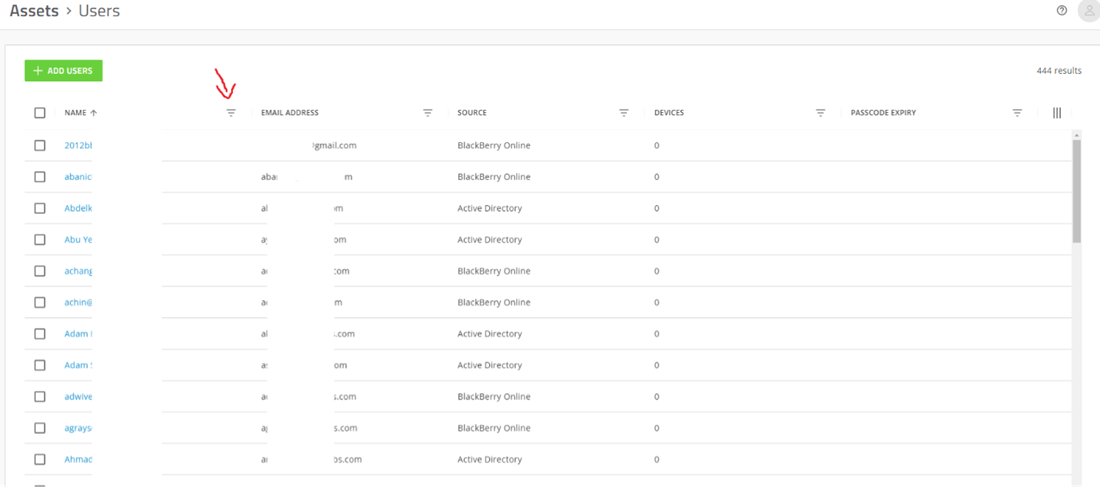
Start by navigating to Assets -> Users. You can search for an existing user using the filter button in the “name” column, as shown below.
If your user does not exist yet, you can add a user by clicking the “Add user” button.
When you have your User selected, click on the “Configuration” tab, and click “Assign User Policies”.
Assign the Enrollment and Gateway Service Policies you created in the previous steps to your user. Once these policies are assigned, you will receive an invitation email at your user’s email address.
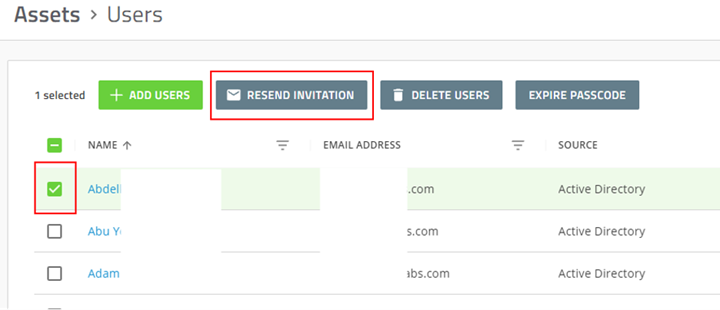
If you don’t receive an email, in the Assets -> Users page, you can select the check box beside your user’s name and click the “Resend Invitation” Button.
2. Installing and Activating CylanceGATEWAY on a device
Assuming you already have a device which is already connected to your CylancePROTECT instance, you can download CylanceGATEWAY on that device using this link.
Once it has been downloaded and installed, you must activate it.
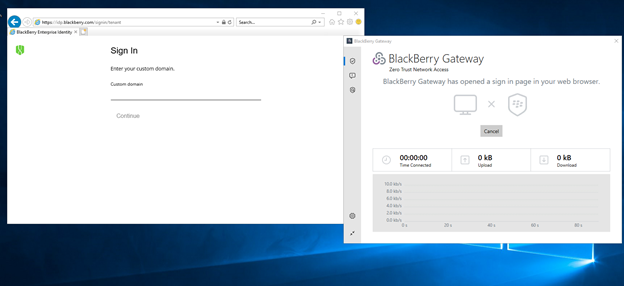
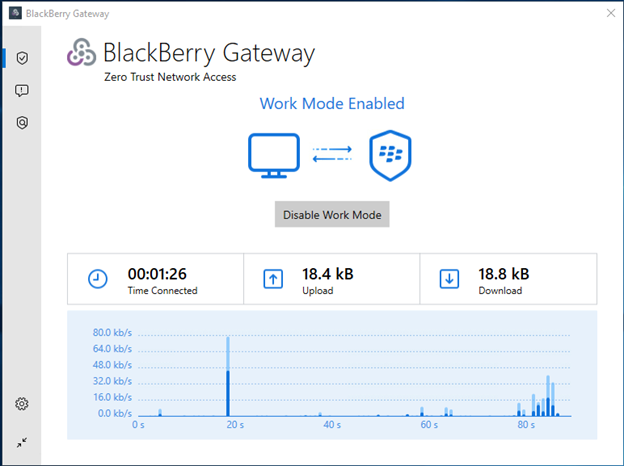
You can do this by clicking the “Enable Work Mode” button. This will open a browser asking for your custom domain.
You can then take the custom domain from the activation email you received earlier and paste it into the custom domain field in the web browser.
Next, input your User’s username and password. Once you have successfully signed in, you should see that work mode has been enabled and Gateway is working properly.
3. Adding Access Control List (ACL) Rules
ACL Rules allow you to block or allow certain connections. For this blog, and to easily test out capturing a CylanceGATEWAY Syslog, we will be blocking YouTube with an ACL Rule.
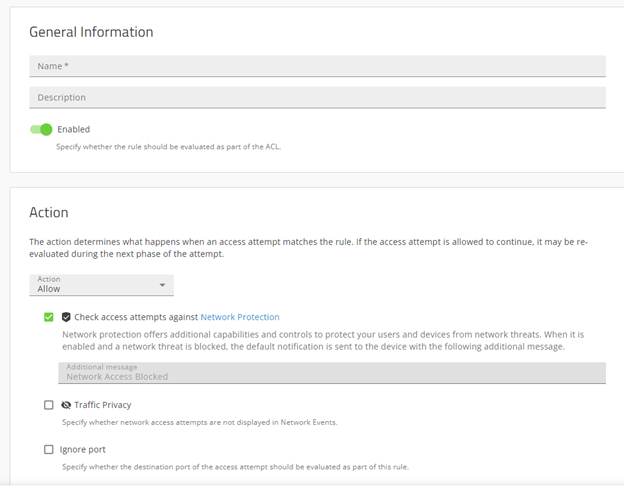
To create an ACL Rule, navigate to Settings -> Network and click “Add rule”. You should see the following screen:
Change the action to “Block”. Then scroll down to the “Destinations” section.
In the “Target” subsection, select “Matches any” and type YouTube into the “Network services” area.
Then we must assign our user to this rule. In the “Conditions” section, select “Matches any” for “Users or groups” and choose “User = <your user>” in the field.
Finally, click the “Add” button at the bottom of the page. This will apply the Rule to your activated User.
Now your User cannot access YouTube through CylanceGATEWAY and if they try, a CylanceGATEWAY Syslog will be sent to your connector!
4. Configuring your Syslog Settings in the CylancePROTECT Console.
I have covered how to get Syslog in my previous blog, you can check it out for more detail. However, here are some of the basics just to get things started.
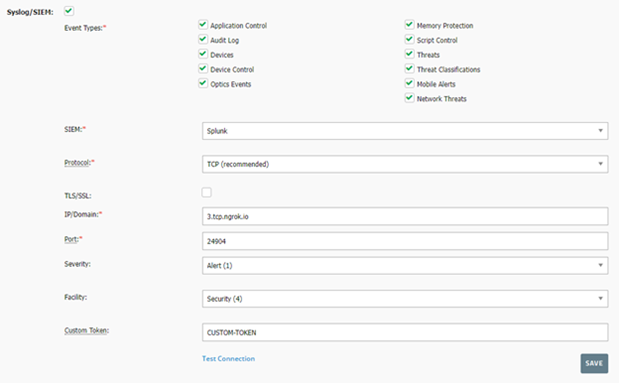
Navigate to Settings -> Application and find the Syslog/SIEM area. Select “Network Threats” at a minimum for CylanceGATEWAY syslogs.
For testing purposes, leave the TLS/SSL option unselected for ease of testing, otherwise, syslogs will arrive encrypted (which you should do in your production environment).
Put in your IP/Domain and port where you will be receiving the syslogs and add a custom token in the custom token field and click save. This address must be accessible by CylancePROTECT, and cannot be, for example, localhost.
You can ensure that the configuration is working by clicking the Test Connection button and checking that you received a test Syslog at your domain and port.
Once you have it all configured, your CylancePROTECT console should look something like the image below.
It’s all coming together
Now for the fun part, triggering the CylanceGATEWAY Syslog event!
On your device with CylanceGATEWAY installed, enable work mode and in any browser, try to go to youtube.com. It will be blocked, and you should receive several syslogs saying access to youtube.com was blocked.
The Syslog you receive should look like the following from our tests:
<38>1 2022-08-09T21:14:10.000000+00:00 sysloghost CylancePROTECT - - [b5791ce3-fb2b-406a-bbd1-a5f1fa6be16a] Event Type: NetworkThreat, Event Name: blocked connection, Eco Id: Ak39RG/kv67XAsKKWIJYIVw=, User: Matt Falkner (mfalkner@test.com), User Name: mfalkner, Message: {"ipRepRisk":"","dManuf":"VMware, Inc.","category":"Bandwidth Consuming","sourcePort":51155,"dId":"ejs-51b5d9de-c73b-4d22-9940-37a3d7b1c6bd-6e54f2b2-e63b-4761-bedb-d22ac1cd9d3f","policyName":"nate_gateway_test","subCategory":"Streaming Media","endpointId":"1f51a840-b66f-45a0-880e-9f24a9562378","venueEndpointId":"","correlationId":"9756a874-c5f8-4c9c-bb10-badb9062125b","action":"blocked","dnsTunnellingNameServer":"","dModel":"VMware7,1","alertType":"accessControl","destPort":443,"protocol":"TCP","dHostName":"SE-STATIC-2G-02.testforyourself.com","tenantId":"S40378603","signature":"Access Control Blocked - TLS","dOsVers":"Windows 10 Enterprise N LTSC 2019 1809","sourceIp":"10.10.0.226","key":"","flowId":16533544392404662,"dnsTunnellingScore":"","mitreData":"","appName":"","threatDetails":"","dPlat":"Windows","dstAddress":"www.youtube.com","endpointIp":"38.100.25.212:50344"}
For more information on what these fields mean and how to make sense of the Syslog, you can refer to the Cylance Syslog Guide.
You may find that you receive many Syslog instead of just one by connecting to YouTube.com. This is because when you go to YouTube.com, there are several requests being made by YouTube behind the curtain, each of them is blocked by CylanceGATEWAY and triggers a Syslog event.
This is a friendly reminder that for this blog, we configured CylanceGATEWAY, so we receive Syslog alerts by blocking access to a website. You can also do the opposite and allow access to certain destinations. You will still receive syslogs for whenever someone goes to that destination, but it will not prevent them from accessing the site.
CylanceGATEWAY Syslogs are a great way of keeping up to date on how your users are using CylanceGATEWAY.
Now you know just how to make them work for you!
About Nathaniel Johnston
Enterprise Solutions Development Student - IoT
.png)