BlackBerry UEM is the first release of our core EMM solution to include public REST APIs. For legacy BES users, BWS (BlackBerry Web Services) was the sole API for programmatically invoking actions on BES and was built on legacy SOAP calls. Good Control, the core EMM Good solution similarly had a collection of SOAP calls, but at the time of its purchase by BlackBerry was already starting down the path of REST API’s. With the release of UEM, REST now takes prominence as the future of API calls from the legacy of both previous products.
Why REST? Primarily two reasons. First, performance. REST calls are tight, minimal JSON objects compared to the broad, rather descriptive calls that SOAP requires. Not particularly friendly to mobile communications given the slower speeds and bandwidths available to mobile users. 2) its JSON, and its 2017. Developers frequently use JSON objects as there default payload whether in web development or native apps. Developers expect to see JSON, not xml. So, as part of the migration from BES/GC to UEM, REST, full speed ahead.
What’s available in the first launch?
REST API’s use the same port and authentication scheme the older BWS interface (port 18084).
EMM functions provided by Good Control have been ported to UEM as REST calls
The initial launch of REST API’s is a short list, but will be growing on each release as we update older calls from SOAP to REST.
As new features are added to UEM, you can expect access to them as new REST API’s.
Note: BWS calls that were in BES12.5 are STILL there, and will remain unchanged.
How to get started… There are many ways to invoke a REST API, commonly, you can build your own (Java, .Net, Javascript, etc.) The online doc’s show samples using the command line tool CURL, but I prefer using a nice UI. I recommend using a modern UI based tool, in this case, I recommend Postman (https://www.getpostman.com/apps )
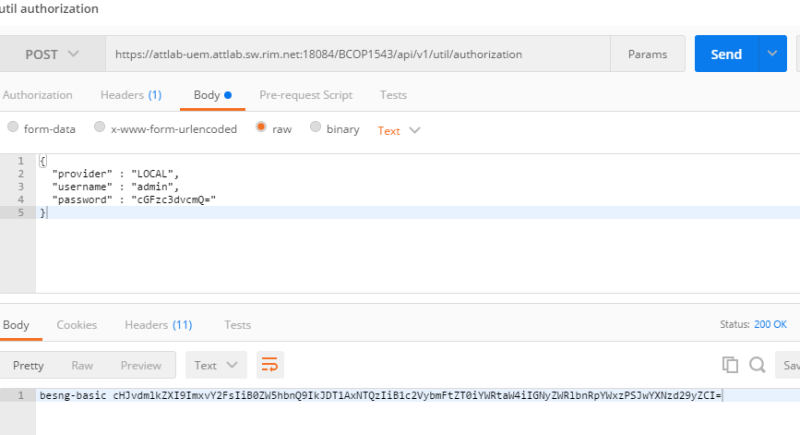
This request is going to be a “POST” not a “GET”. In the body of the “POST” place the following:
1
2
3
4
5
{
"provider": "LOCAL",
"username": "edbourne",
"password": "cGFzc3dvcmQ="
}
or if you are using an AD user, like so
1
2
3
4
5
6
{
"username": "edbourne",
"password": "cGFzc3dvcmQ=",
"domain": "example.com",
"provider": "AD"
}
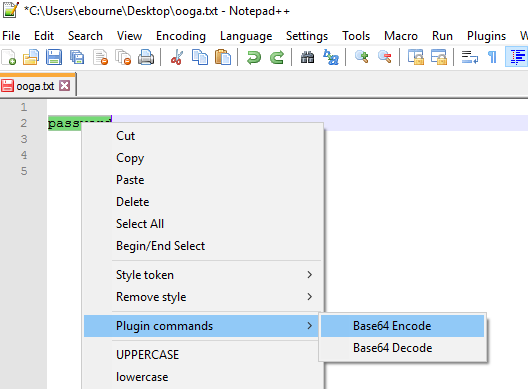
Where the value of password is base64 encoded. This is a bit of a pain. There is no base64 encode command built into Windows (what I’m using). Search for a solution, there are lots, but, if you’re a fan of Notepad++, it does include this as a feature. Simply type in your password (I’m literally using password), highlight it, right click on it, choose plugin commands, Base64 Encode, like so:
Copy and paste the result into the field above.
Here it is with the body displayed:
Here it is with the Headers displayed:
And after you press send with your POST you should see the authorization string you will need:
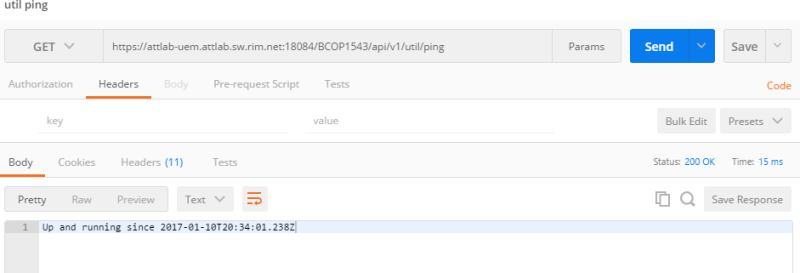
You are now ready to try the authenticated ping from earlier.
What is the difference? This is no /util in the string. The util apis of authorization and ping, do not require authentication, while all other API’s do.
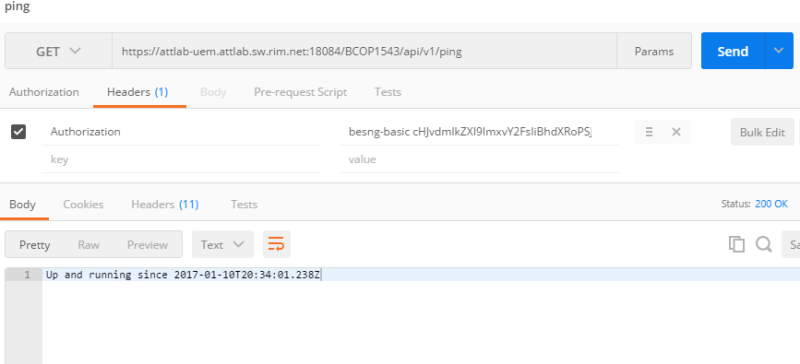
Add a header, with key = Authorization, and value= the string you generated above in the authorization call.
Press send, and you will get the same up and running result as previously.
and of course, I add in a header with the authorization key and value pair from above.
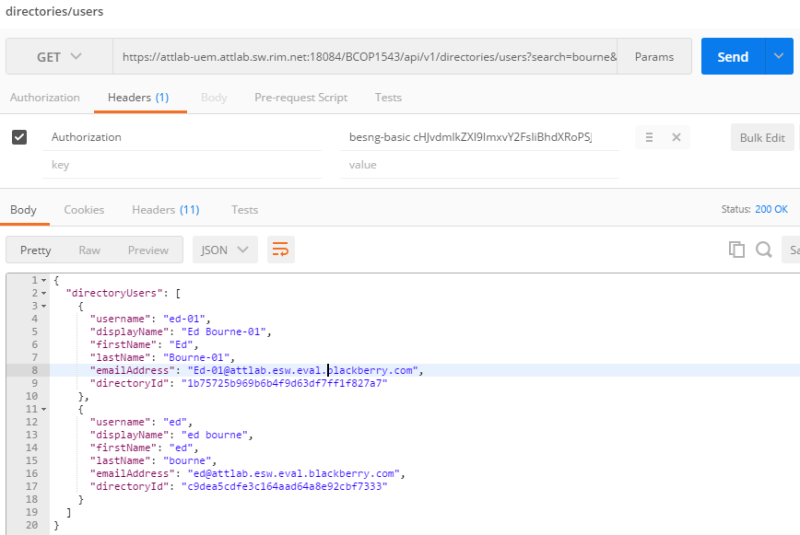
The result looks like this:
Try the other REST API’s in Postman, or whatever tool or language you prefer.
About Ed Bourne
Ed Bourne brings over 10 years of experience in mobility as a Sr. Enterprise Solutions Manager at BlackBerry. Ed manages the technical partnerships with some of our largest Strategic Partners and Customers, helping to foster BlackBerry expertise and bring a compelling mobile experience to our joint customers.