<img data-attachment-id="20986" data-permalink="http://devblog.blackberry.com/2016/01/activate-a-device-on-a-new-bes-in-minutes-installing-bes12-in-the-cloud-on-microsoft-azure/microsoft_azure/" data-orig-file="/content/dam/devblog-blackberry-com/images/blogs/2016/01/microsoft_azure.jpg?w=800" data-orig-size="1018,616" data-comments-opened="1" data-image-meta="{"aperture":"0","credit":"","camera":"","caption":"","created_timestamp":"0","copyright":"","focal_length":"0","iso":"0","shutter_speed":"0","title":"","orientation":"0"}" data-image-title="microsoft_azure" data-image-description="" data-medium-file="/content/dam/devblog-blackberry-com/images/blogs/2016/01/microsoft_azure.jpg?w=800?w=300" data-large-file="/content/dam/devblog-blackberry-com/images/blogs/2016/01/microsoft_azure.jpg?w=800?w=800" class="aligncenter wp-image-20986" src="/content/dam/devblog-blackberry-com/images/blogs/2016/01/microsoft_azure.jpg?w=800" alt="microsoft_azure" width="95%" srcset="/content/dam/devblog-blackberry-com/images/blogs/2016/01/microsoft_azure.jpg?w=800 800w, /content/dam/devblog-blackberry-com/images/blogs/2016/01/microsoft_azure.jpg?w=150 150w, /content/dam/devblog-blackberry-com/images/blogs/2016/01/microsoft_azure.jpg?w=300 300w, /content/dam/devblog-blackberry-com/images/blogs/2016/01/microsoft_azure.jpg?w=768 768w, /content/dam/devblog-blackberry-com/images/blogs/2016/01/microsoft_azure.jpg 1018w" sizes="(max-width: 800px) 100vw, 800px" />
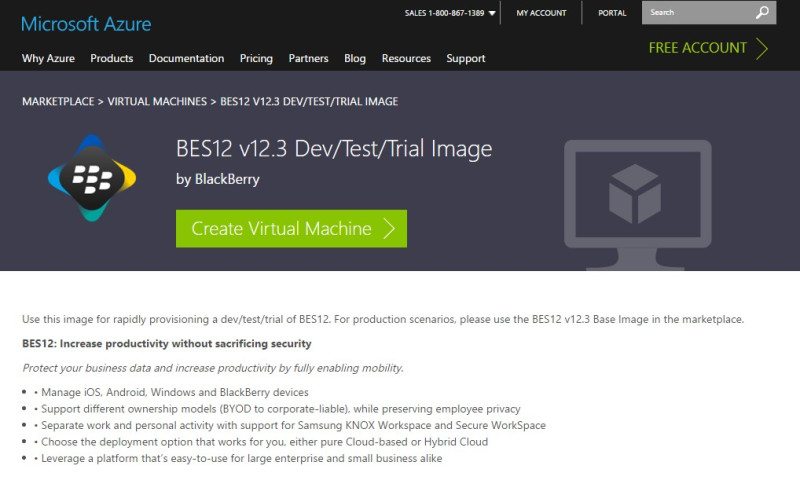
BES12 is now available on Microsoft’s Azure Market Place. Whether you are looking to move your current BES to Azure, or are simply looking for a place to quickly deploy a Development/Test or QA instance of BES12, you can shorten your install by using one of two prebuilt images ready to go. Use an already purchased BES license, or request a new trial one from BlackBerry and you can be up quickly with a functioning BES12 with a Windows Server 2012 instance in the Azure cloud.
If you’re comfortable just diving in, go for it here: Azure Marketplace look for BES12.
But if you want some detail, here is my walkthrough. And by minutes, I mean a simple setup can go as quickly as about 20 minutes.
For this walkthrough, I will be provisioning my factory set BlackBerry 10 device, on a BES12 v3 from the Azure Marketplace. I will be using a free Azure account and a free BES12 trial and doing so from my Windows desktop, so this a great low cost way to try this out for yourself!
If you are not familiar with BES12.3, Windows Server 2012, or want more detail check out https://help.blackberry.com/en/bes12/12.3/ and https://technet.microsoft.com/en-ca/windowsserver/hh553005.aspx .
Either start by requesting a BES12.3 trial then installing the BES from the Azure marketplace , or do this the other way round, by installing with Azure first then request a trial.
For this example, we are going to use the latter and start from Azure Marketplace.
Sign into the Azure portal at http://portal.azure.com using your Azure subscription (or request a free one) Click the new (+) button, and select Marketplace Find the BlackBerry Enterprise Services Dev/Test Trial image. You can search/filter the list of images to make simpler. Click Create Follow each of the steps in the marketplace blade to configure your image. For Example: <img data-attachment-id="20987" data-permalink="http://devblog.blackberry.com/2016/01/activate-a-device-on-a-new-bes-in-minutes-installing-bes12-in-the-cloud-on-microsoft-azure/microsoft_azure_1/" data-orig-file="/content/dam/devblog-blackberry-com/images/blogs/2016/01/microsoft_azure_1.jpg?w=800" data-orig-size="604,743" data-comments-opened="1" data-image-meta="{"aperture":"0","credit":"","camera":"","caption":"","created_timestamp":"0","copyright":"","focal_length":"0","iso":"0","shutter_speed":"0","title":"","orientation":"0"}" data-image-title="microsoft_azure_1" data-image-description="" data-medium-file="/content/dam/devblog-blackberry-com/images/blogs/2016/01/microsoft_azure_1.jpg?w=800?w=244" data-large-file="/content/dam/devblog-blackberry-com/images/blogs/2016/01/microsoft_azure_1.jpg?w=800?w=604" class="aligncenter wp-image-20987" src="/content/dam/devblog-blackberry-com/images/blogs/2016/01/microsoft_azure_1.jpg?w=800" alt="microsoft_azure_1" width="80%" srcset="/content/dam/devblog-blackberry-com/images/blogs/2016/01/microsoft_azure_1.jpg 604w, /content/dam/devblog-blackberry-com/images/blogs/2016/01/microsoft_azure_1.jpg?w=122 122w, /content/dam/devblog-blackberry-com/images/blogs/2016/01/microsoft_azure_1.jpg?w=244 244w" sizes="(max-width: 604px) 100vw, 604px" />
When asked to choose a size, choose a “DS3 Standard” VM.
<img data-attachment-id="20988" data-permalink="http://devblog.blackberry.com/2016/01/activate-a-device-on-a-new-bes-in-minutes-installing-bes12-in-the-cloud-on-microsoft-azure/microsoft_azure_2/" data-orig-file="/content/dam/devblog-blackberry-com/images/blogs/2016/01/microsoft_azure_2.jpg?w=800" data-orig-size="896,570" data-comments-opened="1" data-image-meta="{"aperture":"0","credit":"","camera":"","caption":"","created_timestamp":"0","copyright":"","focal_length":"0","iso":"0","shutter_speed":"0","title":"","orientation":"0"}" data-image-title="microsoft_azure_2" data-image-description="" data-medium-file="/content/dam/devblog-blackberry-com/images/blogs/2016/01/microsoft_azure_2.jpg?w=800?w=300" data-large-file="/content/dam/devblog-blackberry-com/images/blogs/2016/01/microsoft_azure_2.jpg?w=800?w=800" class="aligncenter wp-image-20988" src="/content/dam/devblog-blackberry-com/images/blogs/2016/01/microsoft_azure_2.jpg?w=800" alt="microsoft_azure_2" width="80%" srcset="/content/dam/devblog-blackberry-com/images/blogs/2016/01/microsoft_azure_2.jpg?w=800 800w, /content/dam/devblog-blackberry-com/images/blogs/2016/01/microsoft_azure_2.jpg?w=150 150w, /content/dam/devblog-blackberry-com/images/blogs/2016/01/microsoft_azure_2.jpg?w=300 300w, /content/dam/devblog-blackberry-com/images/blogs/2016/01/microsoft_azure_2.jpg?w=768 768w, /content/dam/devblog-blackberry-com/images/blogs/2016/01/microsoft_azure_2.jpg 896w" sizes="(max-width: 800px) 100vw, 800px" />
It will take about five minutes or more for your Windows Server 2012 VM on a DS3 to configure itself and start up for the first time.
Once the VM has started, connect to the VM using an RDP client, such as Remote Desktop on your Windows PC. You can click the “Connect” button from the VM blade to make this easier. Use the username and password you created in “Basics” to login to the VM. Once you have logged in the server will come up with your first choice: Configure a BES without an Active Directory (standalone) Create a BES in a new Active Directory forest <img data-attachment-id="20989" data-permalink="http://devblog.blackberry.com/2016/01/activate-a-device-on-a-new-bes-in-minutes-installing-bes12-in-the-cloud-on-microsoft-azure/microsoft_azure_3/" data-orig-file="/content/dam/devblog-blackberry-com/images/blogs/2016/01/microsoft_azure_3.jpg?w=800" data-orig-size="1384,815" data-comments-opened="1" data-image-meta="{"aperture":"0","credit":"","camera":"","caption":"","created_timestamp":"0","copyright":"","focal_length":"0","iso":"0","shutter_speed":"0","title":"","orientation":"0"}" data-image-title="microsoft_azure_3" data-image-description="" data-medium-file="/content/dam/devblog-blackberry-com/images/blogs/2016/01/microsoft_azure_3.jpg?w=800?w=300" data-large-file="/content/dam/devblog-blackberry-com/images/blogs/2016/01/microsoft_azure_3.jpg?w=800?w=800" class="aligncenter wp-image-20989" src="/content/dam/devblog-blackberry-com/images/blogs/2016/01/microsoft_azure_3.jpg?w=800" alt="microsoft_azure_3" width="80%" srcset="/content/dam/devblog-blackberry-com/images/blogs/2016/01/microsoft_azure_3.jpg?w=800 800w, /content/dam/devblog-blackberry-com/images/blogs/2016/01/microsoft_azure_3.jpg?w=150 150w, /content/dam/devblog-blackberry-com/images/blogs/2016/01/microsoft_azure_3.jpg?w=300 300w, /content/dam/devblog-blackberry-com/images/blogs/2016/01/microsoft_azure_3.jpg?w=768 768w, /content/dam/devblog-blackberry-com/images/blogs/2016/01/microsoft_azure_3.jpg?w=1024 1024w, /content/dam/devblog-blackberry-com/images/blogs/2016/01/microsoft_azure_3.jpg 1384w" sizes="(max-width: 800px) 100vw, 800px" />
The first choice is the simplest use case. This is a good choice if you are simply testing an application being deployed in the Workspace, and don’t care if the user accounts are managed by AD or if you have email/PIM configured.
It’s also the choice we are going to make.
The installation will take a minute or two, and then the server will reboot to finish the process.
Log back in with RDP, and your desktop will look something like this. <img data-attachment-id="20990" data-permalink="http://devblog.blackberry.com/2016/01/activate-a-device-on-a-new-bes-in-minutes-installing-bes12-in-the-cloud-on-microsoft-azure/microsoft_azure_4/" data-orig-file="/content/dam/devblog-blackberry-com/images/blogs/2016/01/microsoft_azure_4.jpg?w=800" data-orig-size="1384,815" data-comments-opened="1" data-image-meta="{"aperture":"0","credit":"","camera":"","caption":"","created_timestamp":"0","copyright":"","focal_length":"0","iso":"0","shutter_speed":"0","title":"","orientation":"0"}" data-image-title="microsoft_azure_4" data-image-description="" data-medium-file="/content/dam/devblog-blackberry-com/images/blogs/2016/01/microsoft_azure_4.jpg?w=800?w=300" data-large-file="/content/dam/devblog-blackberry-com/images/blogs/2016/01/microsoft_azure_4.jpg?w=800?w=800" class="aligncenter wp-image-20990" src="/content/dam/devblog-blackberry-com/images/blogs/2016/01/microsoft_azure_4.jpg?w=800" alt="microsoft_azure_4" width="80%" srcset="/content/dam/devblog-blackberry-com/images/blogs/2016/01/microsoft_azure_4.jpg?w=800 800w, /content/dam/devblog-blackberry-com/images/blogs/2016/01/microsoft_azure_4.jpg?w=150 150w, /content/dam/devblog-blackberry-com/images/blogs/2016/01/microsoft_azure_4.jpg?w=300 300w, /content/dam/devblog-blackberry-com/images/blogs/2016/01/microsoft_azure_4.jpg?w=768 768w, /content/dam/devblog-blackberry-com/images/blogs/2016/01/microsoft_azure_4.jpg?w=1024 1024w, /content/dam/devblog-blackberry-com/images/blogs/2016/01/microsoft_azure_4.jpg 1384w" sizes="(max-width: 800px) 100vw, 800px" />
At this point, a README document will open in Internet Explorer automatically. http://global.blackberry.com/en/enterprise/bes12-readme.html
Please ensure you read the notes for late breaking information . It will include important information like default passwords for the BES12, etc.
After reading, your next step is to request a BES12 60 day trial. There is a link to the BlackBerry Enterprise Store on the desktop. Click on it and make the request, filling out all the required fields. <img data-attachment-id="20991" data-permalink="http://devblog.blackberry.com/2016/01/activate-a-device-on-a-new-bes-in-minutes-installing-bes12-in-the-cloud-on-microsoft-azure/microsoft_azure_5/" data-orig-file="/content/dam/devblog-blackberry-com/images/blogs/2016/01/microsoft_azure_5.jpg?w=800" data-orig-size="1384,815" data-comments-opened="1" data-image-meta="{"aperture":"0","credit":"","camera":"","caption":"","created_timestamp":"0","copyright":"","focal_length":"0","iso":"0","shutter_speed":"0","title":"","orientation":"0"}" data-image-title="microsoft_azure_5" data-image-description="" data-medium-file="/content/dam/devblog-blackberry-com/images/blogs/2016/01/microsoft_azure_5.jpg?w=800?w=300" data-large-file="/content/dam/devblog-blackberry-com/images/blogs/2016/01/microsoft_azure_5.jpg?w=800?w=800" class="aligncenter wp-image-20991" src="/content/dam/devblog-blackberry-com/images/blogs/2016/01/microsoft_azure_5.jpg?w=800" alt="microsoft_azure_5" width="80%" srcset="/content/dam/devblog-blackberry-com/images/blogs/2016/01/microsoft_azure_5.jpg?w=800 800w, /content/dam/devblog-blackberry-com/images/blogs/2016/01/microsoft_azure_5.jpg?w=150 150w, /content/dam/devblog-blackberry-com/images/blogs/2016/01/microsoft_azure_5.jpg?w=300 300w, /content/dam/devblog-blackberry-com/images/blogs/2016/01/microsoft_azure_5.jpg?w=768 768w, /content/dam/devblog-blackberry-com/images/blogs/2016/01/microsoft_azure_5.jpg?w=1024 1024w, /content/dam/devblog-blackberry-com/images/blogs/2016/01/microsoft_azure_5.jpg 1384w" sizes="(max-width: 800px) 100vw, 800px" />
You will receive a couple of emails, with one leading you to the download page. Click on this link and you will see the SRPID and Activation key for BES12. Leave this page open (might want to shrink it down or minimize it), and click on the BES admin management console URL. You will see what looks like an error, but in fact this is normal. <img data-attachment-id="20992" data-permalink="http://devblog.blackberry.com/2016/01/activate-a-device-on-a-new-bes-in-minutes-installing-bes12-in-the-cloud-on-microsoft-azure/microsoft_azure_6/" data-orig-file="/content/dam/devblog-blackberry-com/images/blogs/2016/01/microsoft_azure_6.jpg?w=800" data-orig-size="1384,815" data-comments-opened="1" data-image-meta="{"aperture":"0","credit":"","camera":"","caption":"","created_timestamp":"0","copyright":"","focal_length":"0","iso":"0","shutter_speed":"0","title":"","orientation":"0"}" data-image-title="microsoft_azure_6" data-image-description="" data-medium-file="/content/dam/devblog-blackberry-com/images/blogs/2016/01/microsoft_azure_6.jpg?w=800?w=300" data-large-file="/content/dam/devblog-blackberry-com/images/blogs/2016/01/microsoft_azure_6.jpg?w=800?w=800" class="aligncenter wp-image-20992" src="/content/dam/devblog-blackberry-com/images/blogs/2016/01/microsoft_azure_6.jpg?w=800" alt="microsoft_azure_6" width="80%" srcset="/content/dam/devblog-blackberry-com/images/blogs/2016/01/microsoft_azure_6.jpg?w=800 800w, /content/dam/devblog-blackberry-com/images/blogs/2016/01/microsoft_azure_6.jpg?w=150 150w, /content/dam/devblog-blackberry-com/images/blogs/2016/01/microsoft_azure_6.jpg?w=300 300w, /content/dam/devblog-blackberry-com/images/blogs/2016/01/microsoft_azure_6.jpg?w=768 768w, /content/dam/devblog-blackberry-com/images/blogs/2016/01/microsoft_azure_6.jpg?w=1024 1024w, /content/dam/devblog-blackberry-com/images/blogs/2016/01/microsoft_azure_6.jpg 1384w" sizes="(max-width: 800px) 100vw, 800px" />
When your BES12 installs, it creates a self-signed certificate for all HTTPS connections, which your server is not familiar with. click on Continue and agree with accepting the warning.
You now are in to the standard BES 12 admin install sequence. First up, login. User name/password defaults to admin/password (you will be required to change this later). <img data-attachment-id="20993" data-permalink="http://devblog.blackberry.com/2016/01/activate-a-device-on-a-new-bes-in-minutes-installing-bes12-in-the-cloud-on-microsoft-azure/microsoft_azure_7/" data-orig-file="/content/dam/devblog-blackberry-com/images/blogs/2016/01/microsoft_azure_7.jpg?w=800" data-orig-size="1384,815" data-comments-opened="1" data-image-meta="{"aperture":"0","credit":"","camera":"","caption":"","created_timestamp":"0","copyright":"","focal_length":"0","iso":"0","shutter_speed":"0","title":"","orientation":"0"}" data-image-title="microsoft_azure_7" data-image-description="" data-medium-file="/content/dam/devblog-blackberry-com/images/blogs/2016/01/microsoft_azure_7.jpg?w=800?w=300" data-large-file="/content/dam/devblog-blackberry-com/images/blogs/2016/01/microsoft_azure_7.jpg?w=800?w=800" class="aligncenter wp-image-20993" src="/content/dam/devblog-blackberry-com/images/blogs/2016/01/microsoft_azure_7.jpg?w=800" alt="microsoft_azure_7" width="80%" srcset="/content/dam/devblog-blackberry-com/images/blogs/2016/01/microsoft_azure_7.jpg?w=800 800w, /content/dam/devblog-blackberry-com/images/blogs/2016/01/microsoft_azure_7.jpg?w=150 150w, /content/dam/devblog-blackberry-com/images/blogs/2016/01/microsoft_azure_7.jpg?w=300 300w, /content/dam/devblog-blackberry-com/images/blogs/2016/01/microsoft_azure_7.jpg?w=768 768w, /content/dam/devblog-blackberry-com/images/blogs/2016/01/microsoft_azure_7.jpg?w=1024 1024w, /content/dam/devblog-blackberry-com/images/blogs/2016/01/microsoft_azure_7.jpg 1384w" sizes="(max-width: 800px) 100vw, 800px" />
Choose your country location. Enter the organization you wish the BES name to be associated with, and then the SRPID and SRP key (authentication key) you were give earlier when requesting the trial. <img data-attachment-id="20994" data-permalink="http://devblog.blackberry.com/2016/01/activate-a-device-on-a-new-bes-in-minutes-installing-bes12-in-the-cloud-on-microsoft-azure/microsoft_azure_8/" data-orig-file="/content/dam/devblog-blackberry-com/images/blogs/2016/01/microsoft_azure_8.jpg?w=800" data-orig-size="1384,815" data-comments-opened="1" data-image-meta="{"aperture":"0","credit":"","camera":"","caption":"","created_timestamp":"0","copyright":"","focal_length":"0","iso":"0","shutter_speed":"0","title":"","orientation":"0"}" data-image-title="microsoft_azure_8" data-image-description="" data-medium-file="/content/dam/devblog-blackberry-com/images/blogs/2016/01/microsoft_azure_8.jpg?w=800?w=300" data-large-file="/content/dam/devblog-blackberry-com/images/blogs/2016/01/microsoft_azure_8.jpg?w=800?w=800" class="aligncenter wp-image-20994" src="/content/dam/devblog-blackberry-com/images/blogs/2016/01/microsoft_azure_8.jpg?w=800" alt="microsoft_azure_8" width="80%" srcset="/content/dam/devblog-blackberry-com/images/blogs/2016/01/microsoft_azure_8.jpg?w=800 800w, /content/dam/devblog-blackberry-com/images/blogs/2016/01/microsoft_azure_8.jpg?w=150 150w, /content/dam/devblog-blackberry-com/images/blogs/2016/01/microsoft_azure_8.jpg?w=300 300w, /content/dam/devblog-blackberry-com/images/blogs/2016/01/microsoft_azure_8.jpg?w=768 768w, /content/dam/devblog-blackberry-com/images/blogs/2016/01/microsoft_azure_8.jpg?w=1024 1024w, /content/dam/devblog-blackberry-com/images/blogs/2016/01/microsoft_azure_8.jpg 1384w" sizes="(max-width: 800px) 100vw, 800px" />
Your BES is now running. You can continue to use RDP if you wish, but once the BES is running, you can now administer it using a web browser from your desktop PC. Log back in with a web browser. If you do it from your desktop (and not in the RDP instance), use the same IP address you use to connect with RDP. Also, make sure to you put in https not http to connect. For example: https://40.76.xx.xx/admin/index.jsp To put in your device licenses, go to the licensing page. <img data-attachment-id="20995" data-permalink="http://devblog.blackberry.com/2016/01/activate-a-device-on-a-new-bes-in-minutes-installing-bes12-in-the-cloud-on-microsoft-azure/microsoft_azure_9/" data-orig-file="/content/dam/devblog-blackberry-com/images/blogs/2016/01/microsoft_azure_9.jpg?w=800" data-orig-size="1291,796" data-comments-opened="1" data-image-meta="{"aperture":"0","credit":"","camera":"","caption":"","created_timestamp":"0","copyright":"","focal_length":"0","iso":"0","shutter_speed":"0","title":"","orientation":"0"}" data-image-title="microsoft_azure_9" data-image-description="" data-medium-file="/content/dam/devblog-blackberry-com/images/blogs/2016/01/microsoft_azure_9.jpg?w=800?w=300" data-large-file="/content/dam/devblog-blackberry-com/images/blogs/2016/01/microsoft_azure_9.jpg?w=800?w=800" class="aligncenter wp-image-20995" src="/content/dam/devblog-blackberry-com/images/blogs/2016/01/microsoft_azure_9.jpg?w=800" alt="microsoft_azure_9" width="80%" srcset="/content/dam/devblog-blackberry-com/images/blogs/2016/01/microsoft_azure_9.jpg?w=800 800w, /content/dam/devblog-blackberry-com/images/blogs/2016/01/microsoft_azure_9.jpg?w=150 150w, /content/dam/devblog-blackberry-com/images/blogs/2016/01/microsoft_azure_9.jpg?w=300 300w, /content/dam/devblog-blackberry-com/images/blogs/2016/01/microsoft_azure_9.jpg?w=768 768w, /content/dam/devblog-blackberry-com/images/blogs/2016/01/microsoft_azure_9.jpg?w=1024 1024w, /content/dam/devblog-blackberry-com/images/blogs/2016/01/microsoft_azure_9.jpg 1291w" sizes="(max-width: 800px) 100vw, 800px" />
Click on Activate licenses and enter the info supplied by your trial request earlier. Now from Users and Devices, click on add user. I’m activating a BlackBerry 10 device with a local user account. Complete the info, but under device activation, select “set device activation password”, and enter one of your choosing. Then press Save. <img data-attachment-id="20996" data-permalink="http://devblog.blackberry.com/2016/01/activate-a-device-on-a-new-bes-in-minutes-installing-bes12-in-the-cloud-on-microsoft-azure/microsoft_azure_10/" data-orig-file="/content/dam/devblog-blackberry-com/images/blogs/2016/01/microsoft_azure_10.jpg?w=800" data-orig-size="676,716" data-comments-opened="1" data-image-meta="{"aperture":"0","credit":"","camera":"","caption":"","created_timestamp":"0","copyright":"","focal_length":"0","iso":"0","shutter_speed":"0","title":"","orientation":"0"}" data-image-title="microsoft_azure_10" data-image-description="" data-medium-file="/content/dam/devblog-blackberry-com/images/blogs/2016/01/microsoft_azure_10.jpg?w=800?w=283" data-large-file="/content/dam/devblog-blackberry-com/images/blogs/2016/01/microsoft_azure_10.jpg?w=800?w=676" class="aligncenter wp-image-20996" src="/content/dam/devblog-blackberry-com/images/blogs/2016/01/microsoft_azure_10.jpg?w=800" alt="microsoft_azure_10" width="80%" srcset="/content/dam/devblog-blackberry-com/images/blogs/2016/01/microsoft_azure_10.jpg 676w, /content/dam/devblog-blackberry-com/images/blogs/2016/01/microsoft_azure_10.jpg?w=142 142w, /content/dam/devblog-blackberry-com/images/blogs/2016/01/microsoft_azure_10.jpg?w=283 283w" sizes="(max-width: 676px) 100vw, 676px" />
On your BlackBerry 10 device, to Settings>Accounts>Email/calendars and contacts to provide the email address you entered along with the device activation password. Once activated, and the workspace is created, the BES will look something like this: <img data-attachment-id="20997" data-permalink="http://devblog.blackberry.com/2016/01/activate-a-device-on-a-new-bes-in-minutes-installing-bes12-in-the-cloud-on-microsoft-azure/microsoft_azure_11/" data-orig-file="/content/dam/devblog-blackberry-com/images/blogs/2016/01/microsoft_azure_11.jpg?w=800" data-orig-size="1237,571" data-comments-opened="1" data-image-meta="{"aperture":"0","credit":"","camera":"","caption":"","created_timestamp":"0","copyright":"","focal_length":"0","iso":"0","shutter_speed":"0","title":"","orientation":"0"}" data-image-title="microsoft_azure_11" data-image-description="" data-medium-file="/content/dam/devblog-blackberry-com/images/blogs/2016/01/microsoft_azure_11.jpg?w=800?w=300" data-large-file="/content/dam/devblog-blackberry-com/images/blogs/2016/01/microsoft_azure_11.jpg?w=800?w=800" class="aligncenter wp-image-20997" src="/content/dam/devblog-blackberry-com/images/blogs/2016/01/microsoft_azure_11.jpg?w=800" alt="microsoft_azure_11" width="80%" srcset="/content/dam/devblog-blackberry-com/images/blogs/2016/01/microsoft_azure_11.jpg?w=800 800w, /content/dam/devblog-blackberry-com/images/blogs/2016/01/microsoft_azure_11.jpg?w=150 150w, /content/dam/devblog-blackberry-com/images/blogs/2016/01/microsoft_azure_11.jpg?w=300 300w, /content/dam/devblog-blackberry-com/images/blogs/2016/01/microsoft_azure_11.jpg?w=768 768w, /content/dam/devblog-blackberry-com/images/blogs/2016/01/microsoft_azure_11.jpg?w=1024 1024w, /content/dam/devblog-blackberry-com/images/blogs/2016/01/microsoft_azure_11.jpg 1237w" sizes="(max-width: 800px) 100vw, 800px" />
All told, this took me about 20 minutes. Enjoy!