 Beaming configurations over the entire tri-state area.
A common requirement of any application being deployed in a large enterprise is the ability for an administrator to remotely configure the application. This avoids the pitfalls of requiring users to enter in configuration information – such as server names and addresses – and enables future flexibility over hard coded values. A few months ago Brent explained how you can do this when using Android for Work in his post Application Restrictions/Configuration.
This capability is also available to all Good Dynamics applications. This means we could build an application that is integrated with Good Dynamics (GD) that uses remote configuration. Now I know what we’re going to do today, we’ll modify a sample to open a URL that is configured on the Good Control server.
In this example we’ll configure some textual information in the Good Control (GC) server, which will be accessible in our application. You can also provide a custom App Policy that is shown to the GC administrator as a custom form, where they can select options you make available in your application. I’ll cover that more advanced topic in a future post.
The sample application used here is an Android application, but the same features are also supported on iOS.
Getting Started
The first thing you’ll need in place is a copy of Android Studio and the Good Dynamics SDK. If you haven’t installed the Good Dynamics SDK yet, do so using the steps found here: Downloading and Installing the Good Dynamics SDK
As a starting point let’s use the Network Connect sample that is part of Android Studio and turn it into a Remote Configuration-Inator. If you already have a GD application you want to add this capability to, you can skip to the next section.
To import the Network Connect sample in Android Studio click on File menu and choose Import Sample. Type “network” into the search box of the Import Sample dialog that appears. Choose Network, click Next, choose the location you want to save the project and then click Finish.
At this point we need to GD enable the sample, which involves adding the GD library and creating a configuration file. To avoid some duplication, I’m not going to list those steps here. But you can find them all in this article: Integrating the Good Dynamics SDK for Android to Your Android Project Where’s Perry?
Create the Remote Configuration-Inator
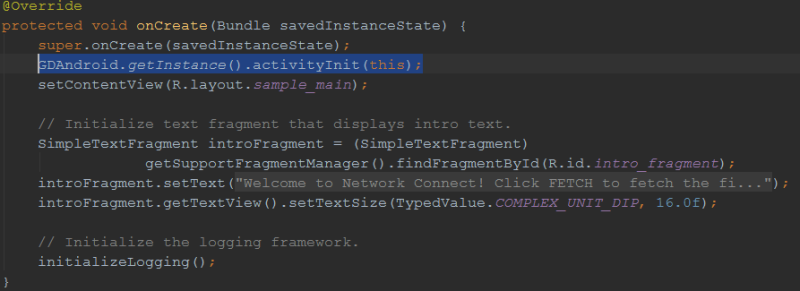
Connecting to the GD platform requires authorization processing, and requires that every activity in the application is monitored by the GD Runtime. Both of these requirements can be met by using the activityInit API. To add this to the Network Connect sample, open MainActivity.java and locate the onCreate method. Add the line below after the super call.
1 | GDAndroid.getInstance().activityInit(this); |
The onCreate method should now look like this:
Our application must handle transitions in the GD authorization life cycle. Every activity can be its own handler for these transitions. We’re going to do this by implementing GDStateListener in MainActivity. Add “implements GDStateListener” after “extends FragmentActivity” in MainActivity as shown here:
![]()
After doing so you’ll see an error on this line reminding us that we need to implement the required methods for the GDStateListener interface. Click on the red light bulb, choose Implement Methods and let Android Studio insert the missing methods.
There is one method of GDStateListener that is relevant to this topic, onUpdateConfig(Map<String, Object> map). This method fires when the application receives a new configuration that was set on the Good Control server. We’re not going to use this today since we’ll just use the most recent configuration. But if you need to track configuration updates within your application or take some action when the configuration changes, this method will be important to you.
The changes we are going to make will be in the onOptionsItemSelected(MenuItem item) method of MainActivity.java. Locate that method and the following line.
1 |
Comment out that line and replace it with the following code. Have a read through the comments to learn what each section is doing.
1 2 3 4 5 6 7 8 9 10 11 12 13 14 15 16 17 18 19 20 21 22 23 24 25 26 27 | //Get the application configuration.Map<String, Object> config = GDAndroid.getInstance().getApplicationConfig();//For fun, let's have a look at all the application configuration values.for (Map.Entry<String, Object> entry : config.entrySet()){ android.util.Log.i("Map Updated: ", entry.getKey() + "/" + entry.getValue());}//Grab the values relevant to make our network connection.String server = (String)config.get("appHost");Integer port = (Integer)config.get("appPort");String page = (String)config.get("appConfig");//Verify all values were set.if (server == null || port == null || page == null){ mLogFragment.getLogView().setText("Error: Host, port or page was null.");}else{ //Make the network connection. String url = "https://" + server + ":" + port.toString() + page; Log.i("Connecting to: ", url); new DownloadTask().execute(url);} |
The appHost, appPort and appConfig values we read above will be configured in our Good Control (GC) server. appHost and appPort are configured as a server, but appConfig is just raw text data we input into the server. You could format this using JSON, XML or whatever makes the most sense for your application. For simplicity and since we only have one parameter we’re configuring, this sample just uses raw text so we don’t have anything to parse. Now we’re ready to configure all over the entire tri-state area!
Configure and Fire the Remote Configuration-Inator!
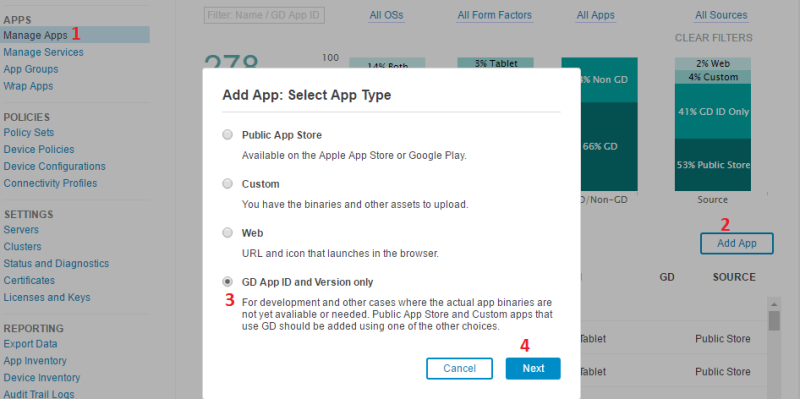
Now we need to set up our application for testing and configure it in the GC. After logging into your GC, click on Manage Apps, Add App, select GD App ID and Version only and click on Next. These steps are shown in the screenshot below.
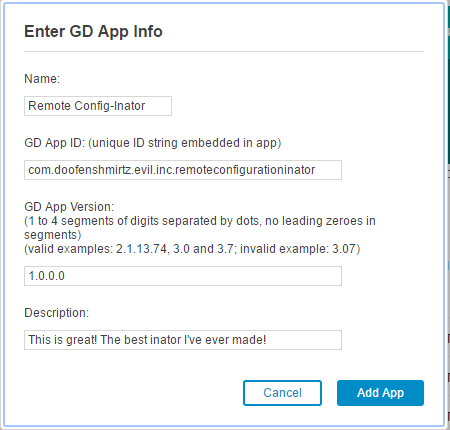
Next we enter in the GD App ID that was set in the settings.json file created in the getting started section. Here’s the information I used.
The application will now be included in the list of applications available on your server. Find it in the list on this screen and click on it. Here is where the configuration begins!
Click on Good Dynamics and then EDIT that is next to Server as shown here.
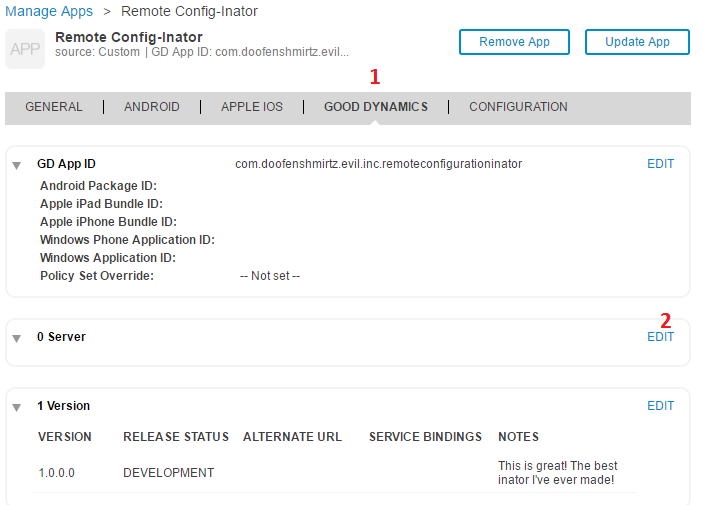
Now we are ready to enter the configuration information that will be sent to our application. Here are some evil values you could use. Make sure you press the + button to add the server and then the Save button when you are done.

Choose Someone to be Configured
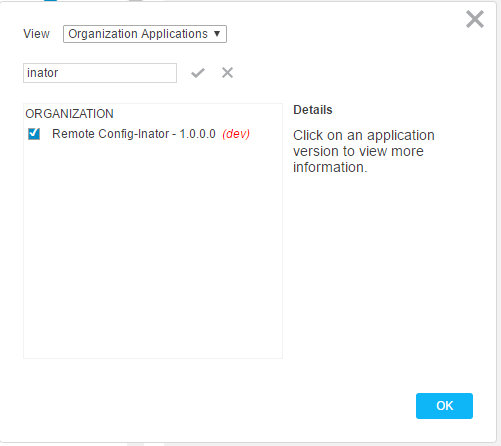
Now that the application has been added to the GC server, we can assign it to our account so we’re able to install it. Click on Users and Groups, check the user to edit and choose Edit User from the drop down. Then click on Add More and assign this application to the user. After clicking OK it should appear the user’s application list.
The final step to do in the GC is to create an access key that’ll be used to install the application. Click on Access-Keys and then press the New Access Key button. Note this key, we’ll use it soon.
See It in Action – Configuring the Entire Tri-State Area
Configuration for the Remote Configuration-Inator is now complete and we’re ready to test it out. Go back into Android Studio and run the application on your device. On first run, you’ll need to activate the application using the access key created in GC and set a password. Once that’s is complete press the Fetch button to download the text of the page you configured in the GC.
Did you remember that the code we added also printed out all of the configuration information for the application? Have a look at logcat after pressing Fetch and you’ll see something like this:
1 2 3 4 5 6 7 8 9 | I/Map Updated:: preventPasteFromNonGDApps/falseI/Map Updated:: userId/ msohm@doofenshmirtz.comI/Map Updated:: appConfig//wiki/Dr._Heinz_DoofenshmirtzI/Map Updated:: appPort/443I/Map Updated:: detailedLogsOn/falseI/Map Updated:: copyPasteOn/trueI/Map Updated:: appHost/en.wikipedia.orgI/Map Updated:: appServers/[com.good.gd.GDAppServer@21891938]I/Map Updated:: upn/msohm@doofenshmirtz.com |
And there we have it. You’ll now have the ability to change your application’s configuration whenever you need to.